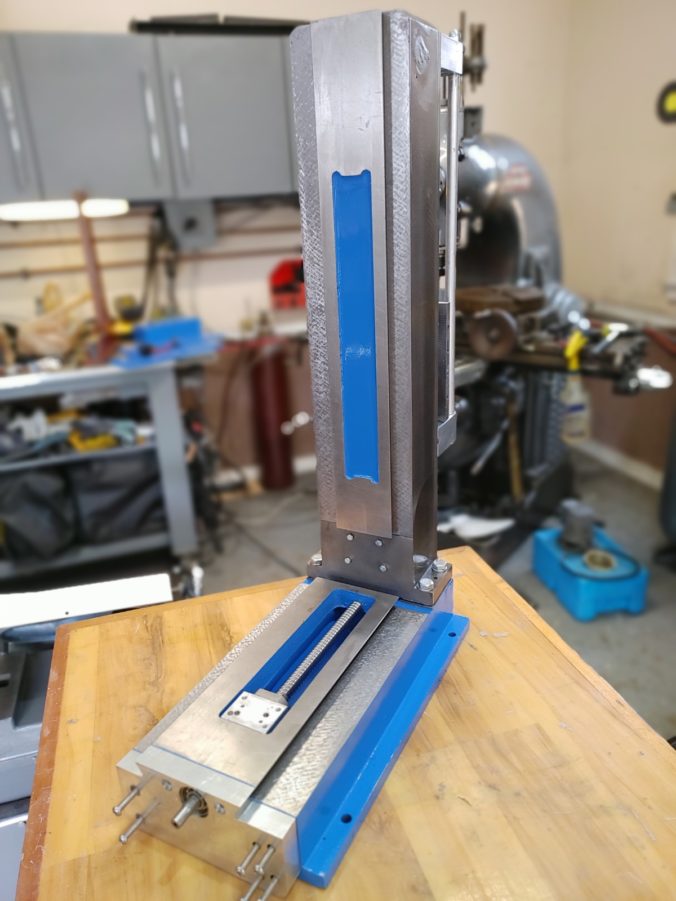
Having reinforced the Sieg 2.7 bench top mill column, reinforced the head, and dry fitted the Z-axis and Y-axis CNC components, it is time to finally pull base, column, and head together. Before doing this, it is time for a final modification to further improve rigidity and cut down on vibration.
By moving the Z-axis ball screw to the outside of the column, we’ve made it possible to fill the entire column with epoxy granite to add weight and stability. Recall, we inserted a piece of 1/2″ threaded rod where the Z-axis lead screw used to go, and secured it so it will extend into the base to provide an additional point to secure the column to the base. We’ve also used extra long bolts when fixing components to the column, to provide more real estate for the epoxy to grip.
The mill base, similarly, is prime real estate for an epoxy granite pour. Because we have to leave room for the Y-axis ball screw, we’ll first halve a 3″ PVC pipe, close off one end, and fix it to the underside of the base using silicon caulking. A 1″ PVC pipe is secured vertically to keep an area free around the hole for the column threaded rod, which will allow us to secure it with a nut from the underside.
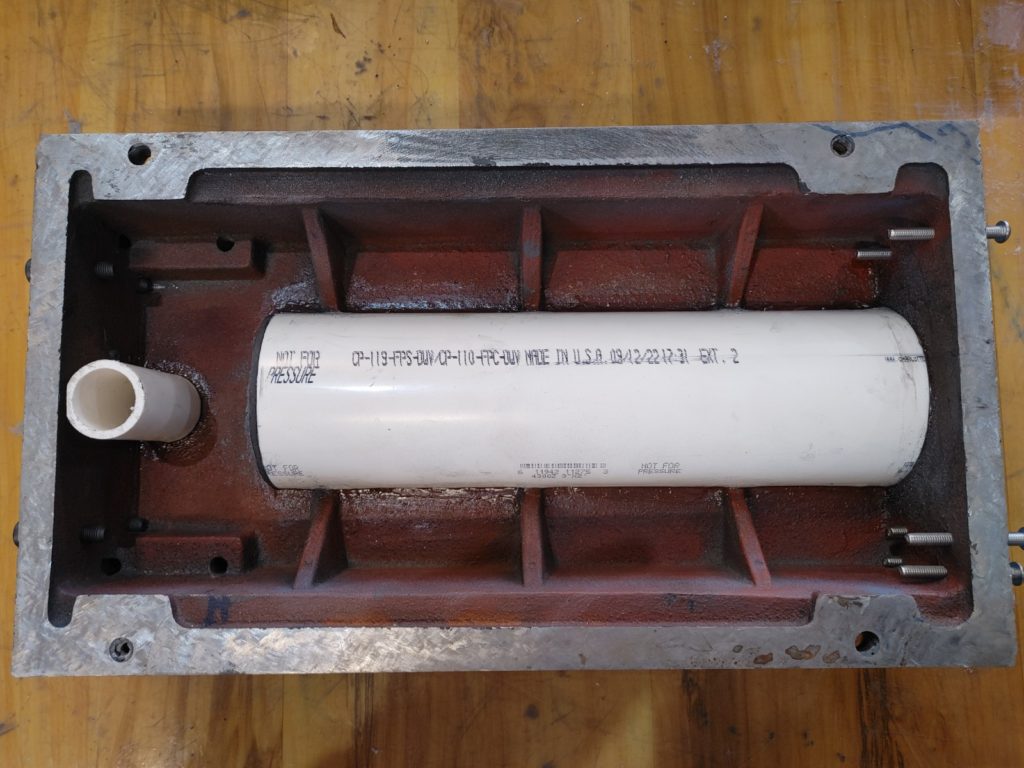
To make sure we can later secure the Y-axis front plate and the column reinforcing plate (providing 4 more new points of connection from column to base), we will go ahead and thread bolts into the tapped holes in the base casting, coated with silicon grease. After about 8 hours when the epoxy granite firms but prior to full cure, we’ll back them out a tad to break the bond with the epoxy.
Choosing the Epoxy Granite Mix
There is a CNC Zone thread with, as of the date of this writing, 253 pages (!) of discussion about the optimal epoxy granite mix. I don’t know about you folks, but I’d much prefer building my machine to reading 253 pages of folks debating epoxy. And to be fair, for this application we are using the epoxy granite to fill a casting which will do most of the structural work, so we are less concerned about achieving optimal strength. If we were building the machine entirely out of epoxy granite, the approach would probably be different.
From what I’ve been able to gather, a good epoxy granite recipe is one that uses the least amount of expensive epoxy while maintaining good strength. This comes from a selecting a good mix of large aggregate (pebbles or rocks), small aggregate (sand), and even smaller aggregate that achieves a good density where gaps are filled by smaller and smaller aggregate pieces.
To approximate this, I chose to use plain Home Depot play sand, pea gravel, and diatomaceous earth. Instead of agonizing about exact percentages, I targeted:
15% diatomaceous earth (one 5-pound bag was sufficient)
15% epoxy (a 1-gallon kit was perfect)
15% sand (1 bag of Home Depot play sand), and
55% pea gravel (washed and dried).
I mixed and filled the epoxy granite in batches, with the first and last batch omitting the gravel to ensure a smooth finish (OK, I forgot to do this for the last pour of the base but it worked out). There are a lot of other good internet resources on mixing and pouring epoxy granite, so I won’t repeat that process here.
The mixing and pouring of the epoxy was fairly straightforward, though hard on the wrists. My only advice for anybody out there contemplating this is to (a) mix in small batches; and (b) mix everything first with the less viscous hardener before adding the gel-like epoxy base to make the mixing step easier.
After mixing all my ingredients, the epoxy stuck like its life depended on it, and I was pleased with the results in both column and base:
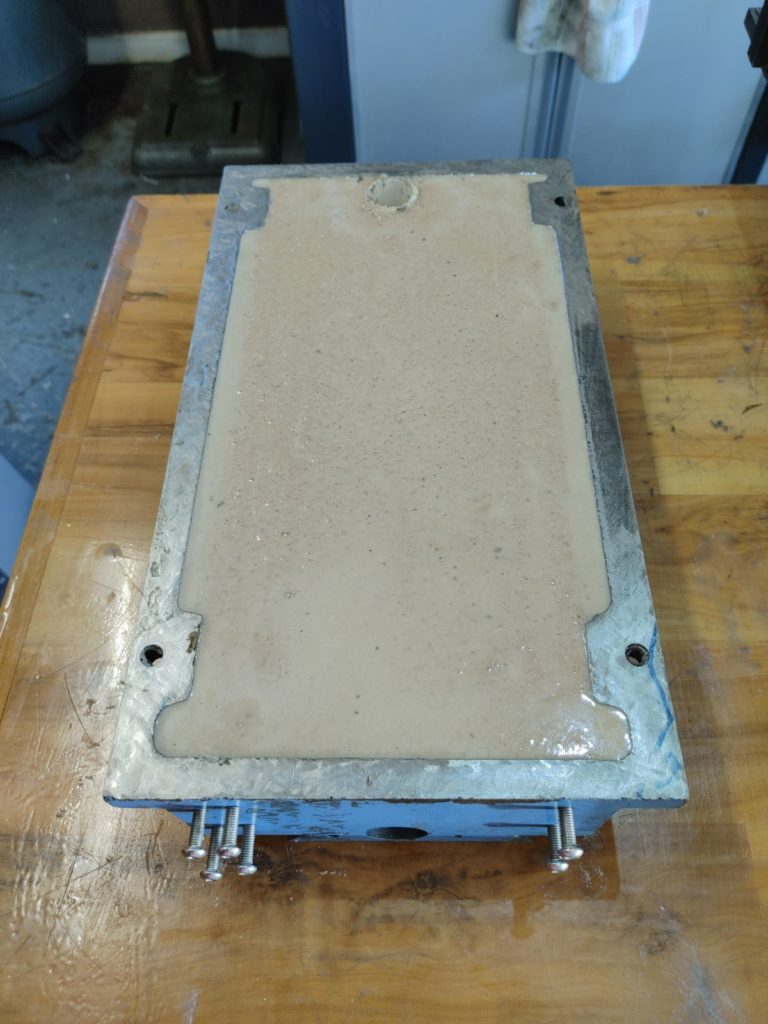
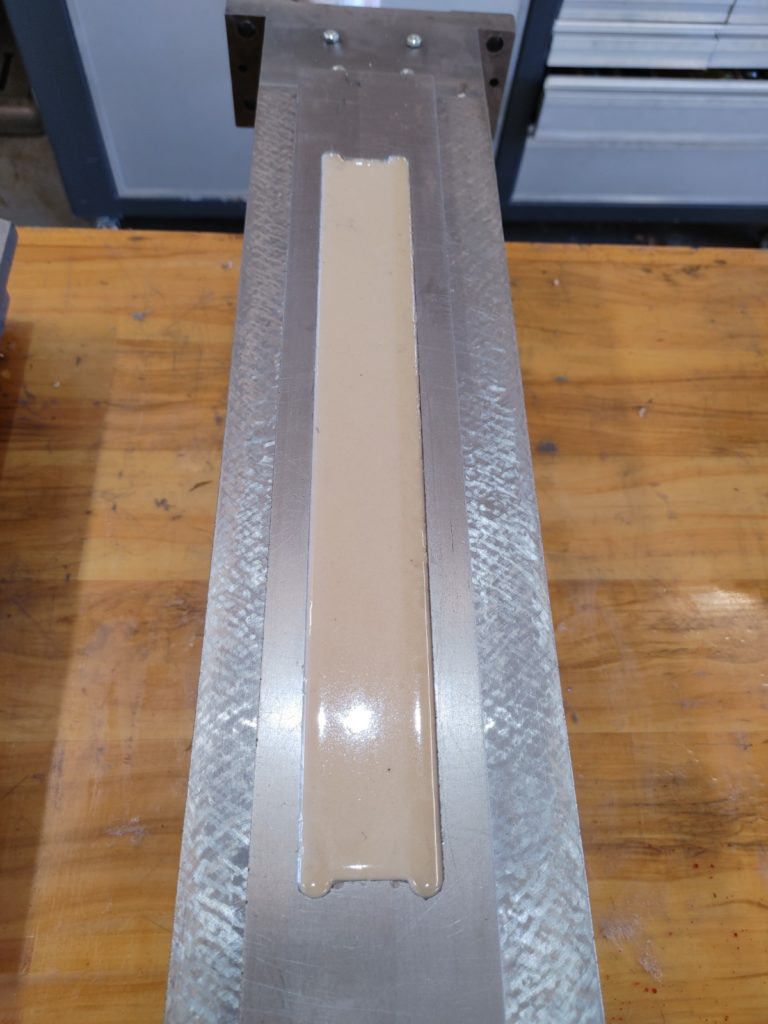
From here, it was a matter of painting over the lovely Pepto Bismol colored epoxy to make it slightly more attractive. The base has also been manhandled quite a bit as we’ve prepared it for the addition of CNC components, so a new coat of paint was added.
A quick note on the color: I’m not a particular fan of blue for machine tools, but this “sail blue” Rust-Oleum color matches the original Benchmill 6000 color and is at least consistent with the original Sieg 2.7 castings from LittleMachineShop. Fun fact, sail blue is also a good match for Kurt vises. It is actually growing on me…
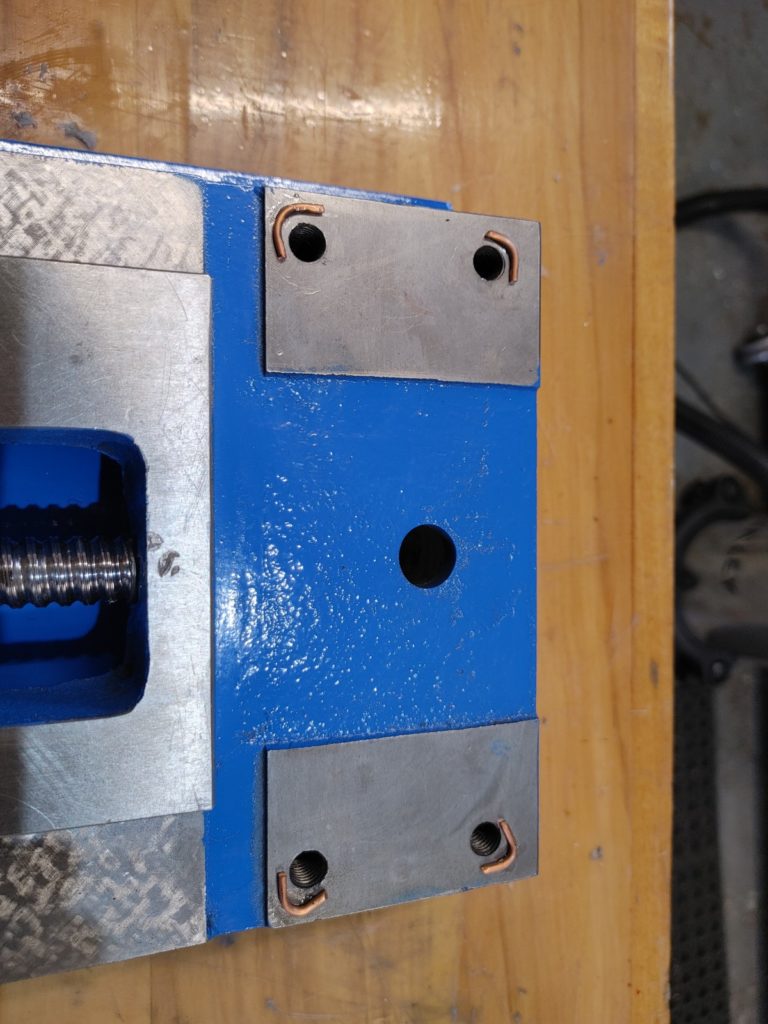
Before fixing the column to base I stripped, bent, and super glued four copper 12 gauge wire segments to create separation between the base and column flange, but to allow movement when the column is trammed. The idea is that these will act something like crush washers. Just before tramming, we’ll inject machine epoxy in the gap, selectively tighten the bolts to bring the column perpendicular to the table, then allow the epoxy to set before final tightening.
For now, we’ll hand tighten the four M10 flange bolts and the 4 M8 bolts on the back of the column reinforcing plate. The 1/2″ threaded rod will be similarly secured with a piece of 1/2″ threaded rod connecting sleeve threaded in through the gap left in the bottom base epoxy concrete casting. This will bring us from 4 original points of contact in the original Sieg 2.7 configuration to 9 plus an epoxy bond.

We are now in the home stretch in building the upgraded mill iron for our Benchmill 6000. Next up, we’ll complete the CNC component installation for the X–axis.