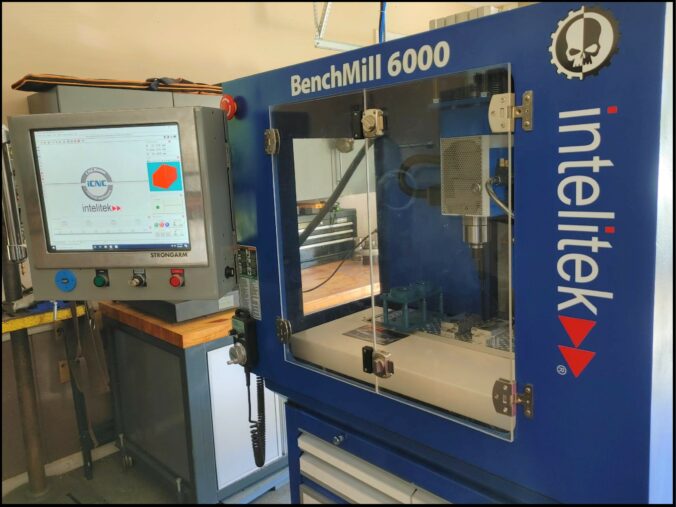
Having enclosed the upgraded Sieg 2.7 mill using the old Benchmill Enclosure, we’ll now establish power and get the controller and control interface running. We know that everything works independently, so it *should* just be a matter of connecting components.
One initial challenge lies in the fact that we’ve seriously upgraded the stepper motors on all three axes from the little 1.35 Nm motors that came with the original Sieg iXK1 to 4Nm on the Y and Y axes, and 9 on the Z. These draw considerably more power (I have the drivers set to 5-7 amps each). In addition, the new spindle motor draws up to 8 amps at 220v. The original Benchmill transformer tops out (if I recall correctly) at only around 10 amps, so we have some power delivery work to do.
We’ll tackle the problem in two ways: (A) by creating dedicated and upgraded power delivery to the stepper motor drivers; and (B) by running a second dedicated 220v line to drive the spindle.
Upgrading Power Delivery to Stepper Drivers
For the stepper driver power delivery, we’ll get rid of the original transformer in favor of an Antek 500VA, 30V toroidal transformer, which should give us up to 15 amps at 30v. An additional advantage of the toroidal design over the original Benchmill transformer is that it should be, in theory, lower noise.
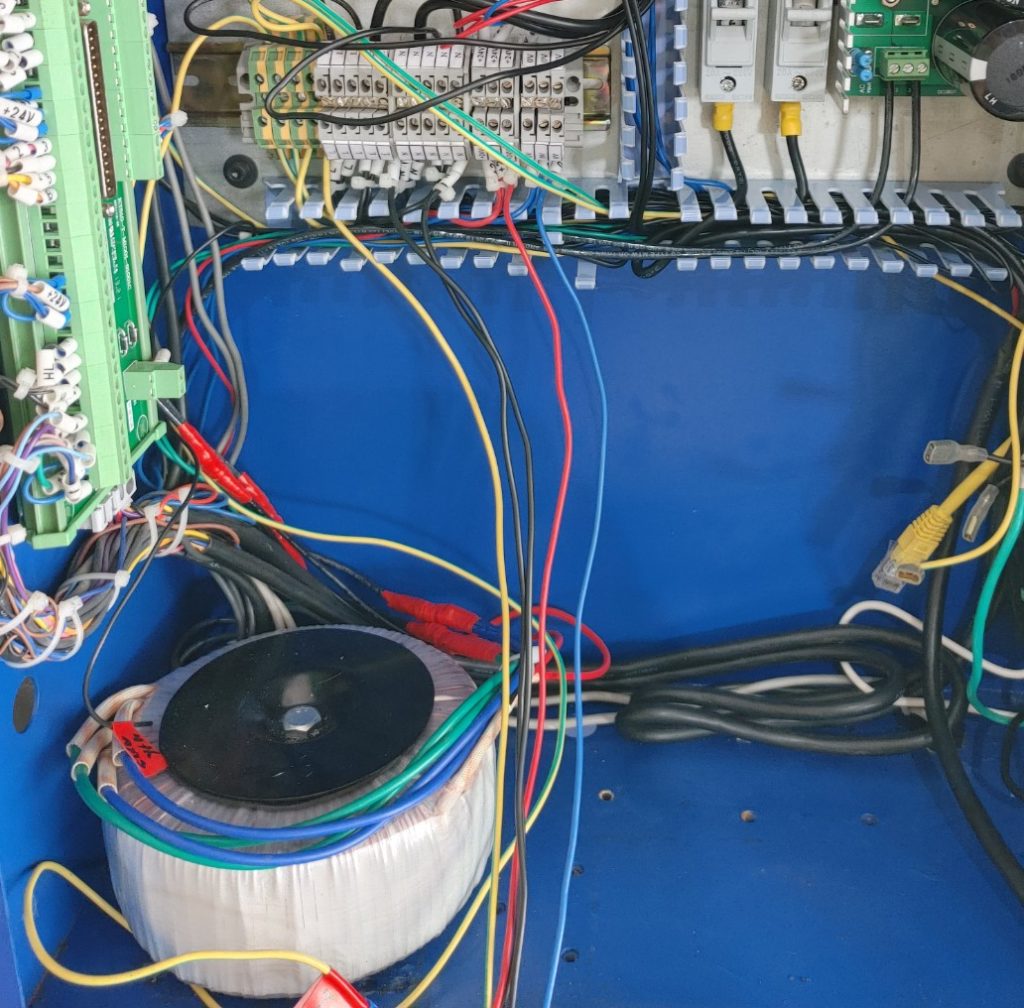
Next, we’ll run this power through an 80v (max) rectifier (again from Antek) to give us DC power to feed the stepper motor drivers. With 30v AC input, this rectifier outputs right around 40v DC, which is in the voltage sweet spot for the drivers. Finally, we’ll substitute 16 amp fuses for the 10 amp fuses that came with the Benchmill and upgrade the power delivery wiring to 14 gauge.
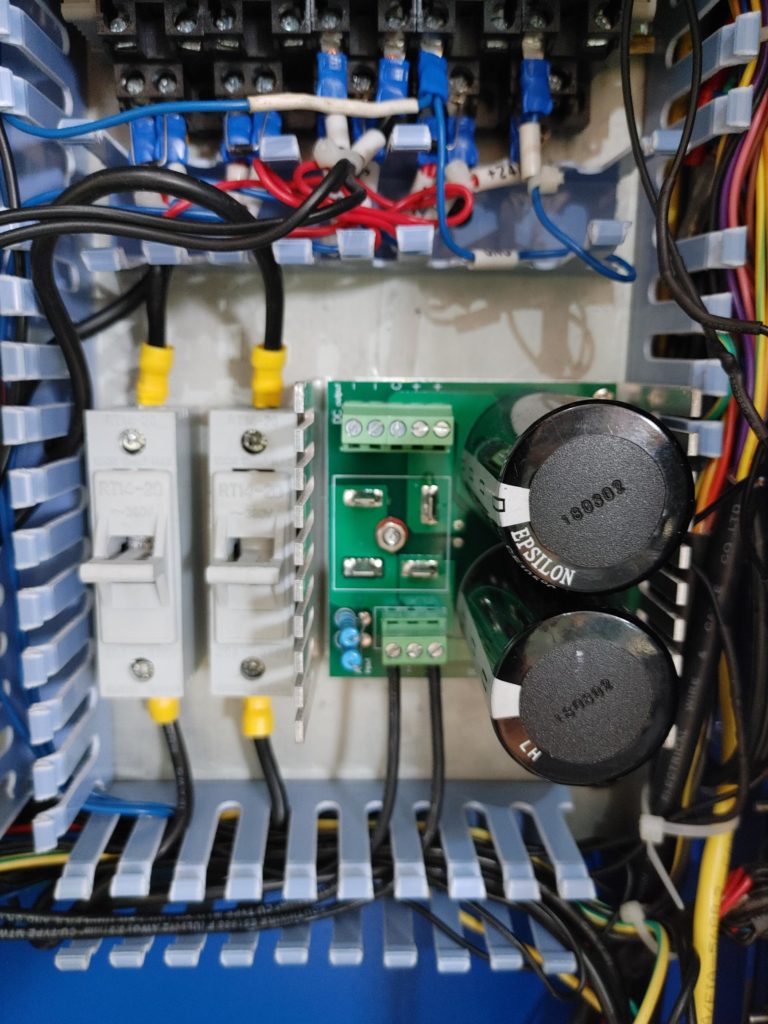
While we are in the business of upgrading power delivery, we’ll also replace the old 5v / 24v dual power supply with a newer model from the same manufacturer. The RD-65B supplies a couple of extra amps on the 24v rail at the cost of 1 amp on the 5v rail. Because most of the draw is on 24v, this is a good tradeoff.

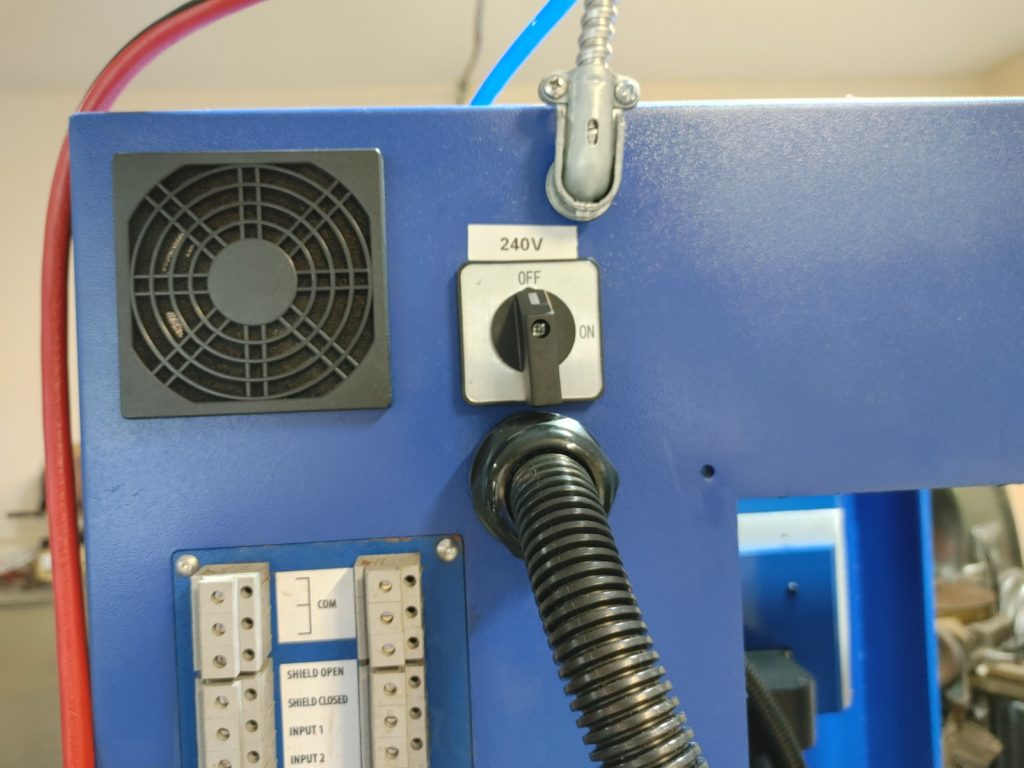
Dedicated 220v Power to Spindle
As the second part of the power upgrade, we’ll tackle the spindle motor draw by running a separate 220v line, with its own 10amp circuit breaker, dedicated to the servo motor driver. Adding this line necessitated installing a separate switch, which was easy to do. Overall, this was simple.
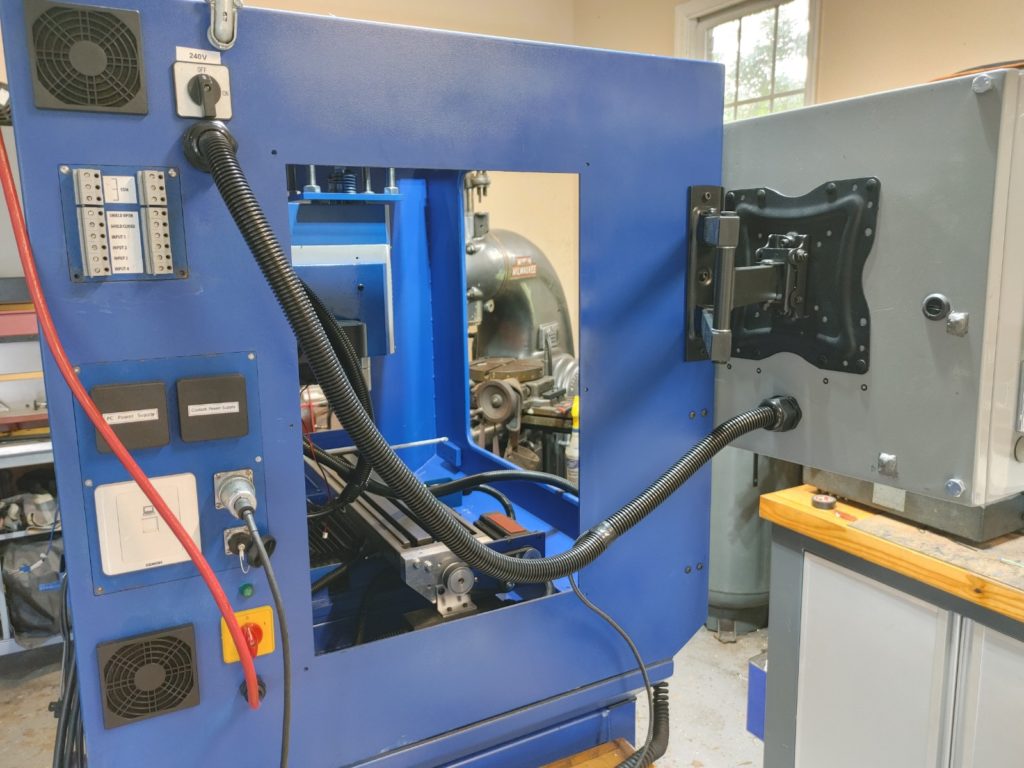
I’m running both 110v and 220v power (armored cable and extension cable), as well as compressed air (blue line seen here), from above to keep the cabling out of the way.
Adding Control Interface
For the control interface, I used a Schaefer top mount control box picked up second hand from Ebay. Instead of a pendulum arm, it is mounted to the Benchmill enclosure using a television mounting arm rated at 100 pounds.
For a monitor, I bought a Strong Arm 17″ touch screen from Ebay for peanuts. It didn’t fit the Schaefer box initially, so out came the angle grinder. After some persuading, it bolted in nicely.
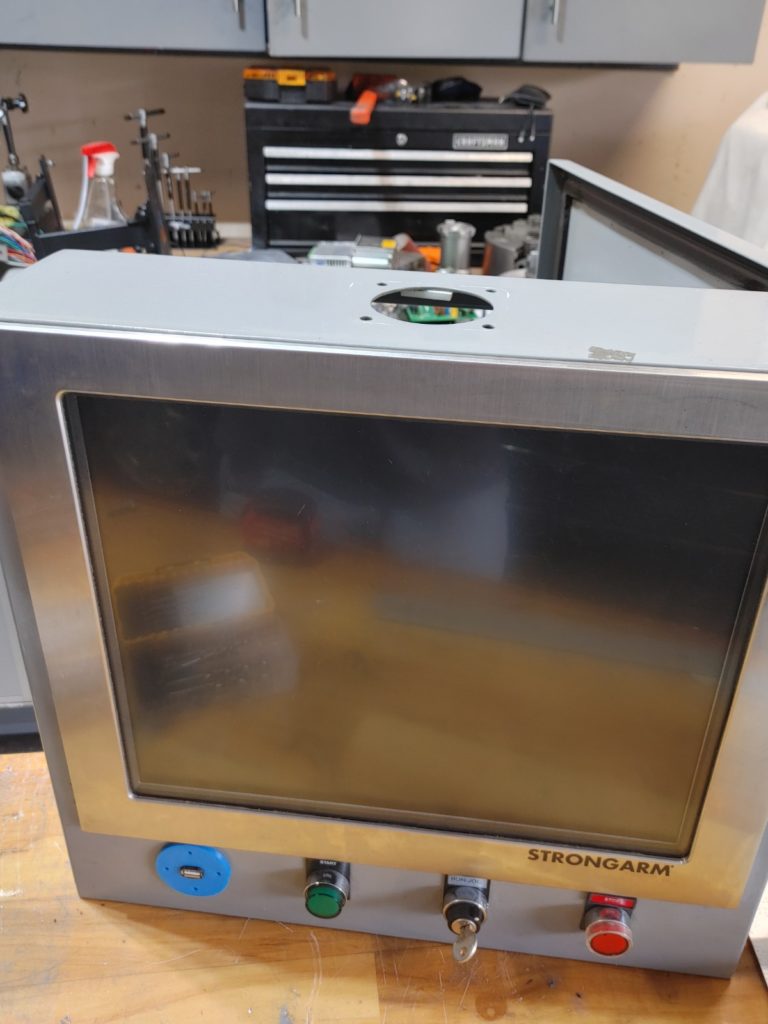
Not shown: I ran wiring from the stop switch to the emergency stop circuit, and soldered the PC “on” power switch leads to the green button on the Schaefer box. I also added a 3D printed mount for a USB drive connection.
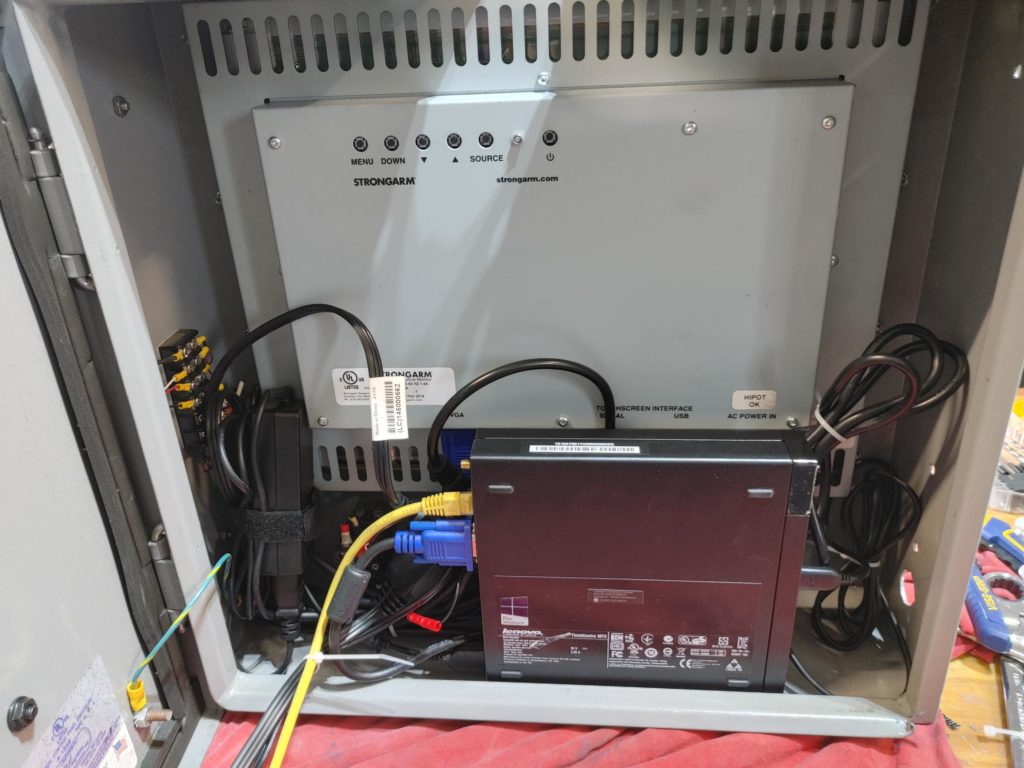
The Schaefer enclosure left plenty of room for a small form factor PC that I picked up refurbished from Amazon. It has an Intel i5 quad core processor, 8GB of RAM, and an SSD. Plenty fast enough to run the Intelitek control software.
With power connected, the computer booted right up, the Intelitek control software loaded, and the controller gave me green lights across the board. More importantly, no blue smoke!
Now that we have power and the computer talking to the controller, we’ll start the process of connecting all of the stepper motors and the spindle .