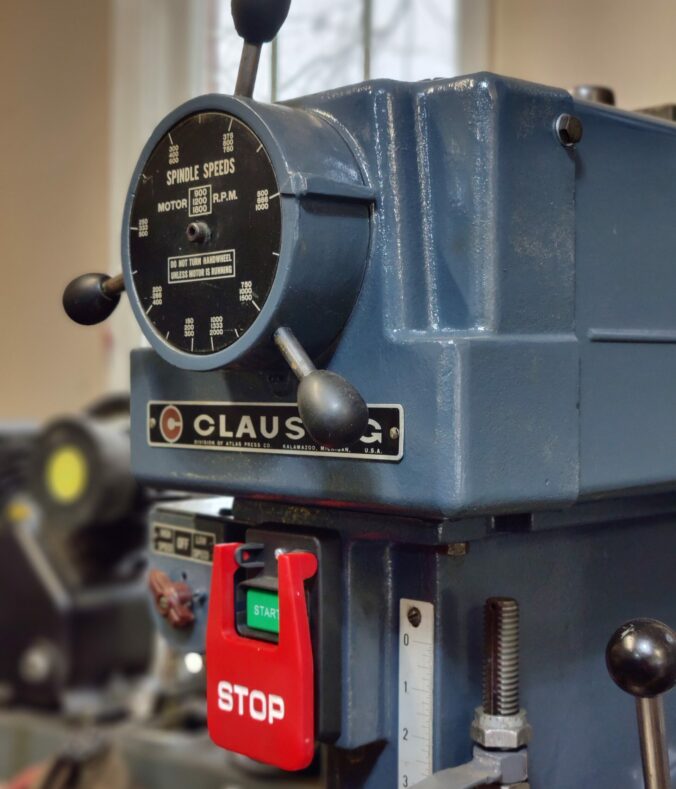
Having replaced the spindle bearings and fixed the issues with the Reeves drive intermediate shaft of the Clausing 20″ drill press, it is now time to reassemble the machine and put it into service. While they were apart and everything was disassembled, I degreased all of the castings and gave them a coat of KBS Coatings “top coat” in battleship grey (which really turned out to be more of a grey-blue). Even though the color wasn’t what I expected, it has grown on me.
Cleaning up the 4″ center column was a bit more of a chore. Thirty+ years of grime and surface rust left it severely gummed up. After struggling with a brush and various cleaners for a while, I decided to just chuck the column up in my LeBlond, supporting the far end using a steady rest. I then set it to a few hundred RPMs and attacked the grime with green scotch brite pads and mineral oil. It worked a treat. In the future, I wouldn’t tackle this job any other way.
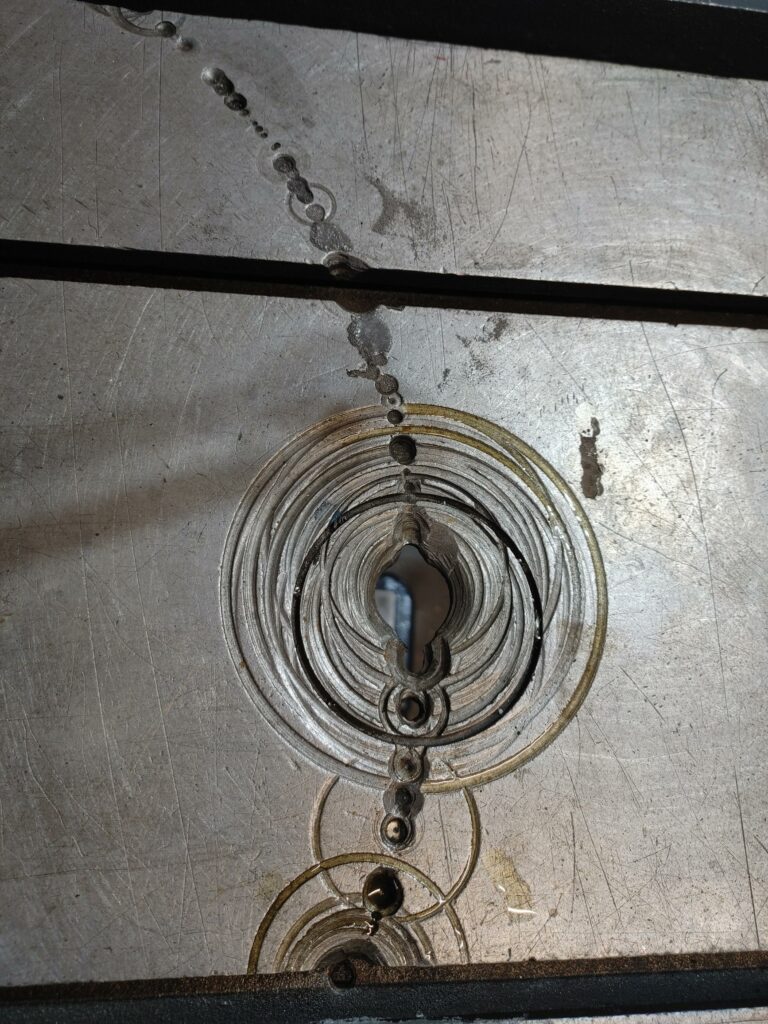
The Clausing table suffers from a fairly advanced case of the “Arc of Shame”. That was expected on a machine this old, but in addition there were a number of concentric circles carved into the center section of the table. Maybe someone out there can tell me what the heck caused these (a hole saw, annular cutter, or something acting like a fly cutter, I guess), but whatever it was created a mess. I will eventually either find a replacement table or locate some tooling plate to fix to the top, but in the meantime I just filled the holes with epoxy and declared (temporary) victory.
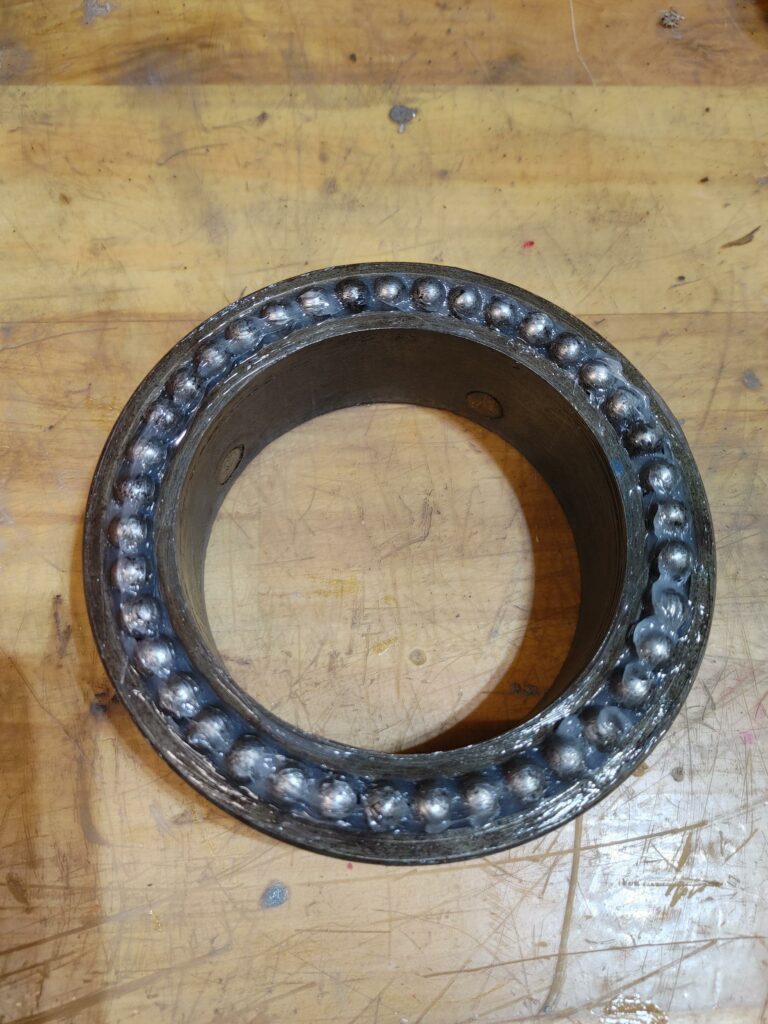
The table itself rides on a set of ball bearings captured in the ring that rides up and down the column. These were gummed up, causing the table to catch and grind when rotated to the left or right. With the bearings cleaned and repacked, the table rotated as it should.
After the paint dried, I reassembled the press with new drive belts and then turned my attention to the power. The Clausing motor is plenty beefy at 1-1/2HP, but runs on three phase, 220V. To make her go, I attached a 1.5KW cheap VFD directly to the upper casting, and added a power switch to the VFD where an old motor starter lived. This allows me to power off the VFD when the machine is not in use.
The original push button “on/off” switch was in bad shape, so I replaced it with a newer paddle switch. No real current runs through the switch, which simply closes a 5V signal to the VFD to tell it to deliver or cut power to the motor.
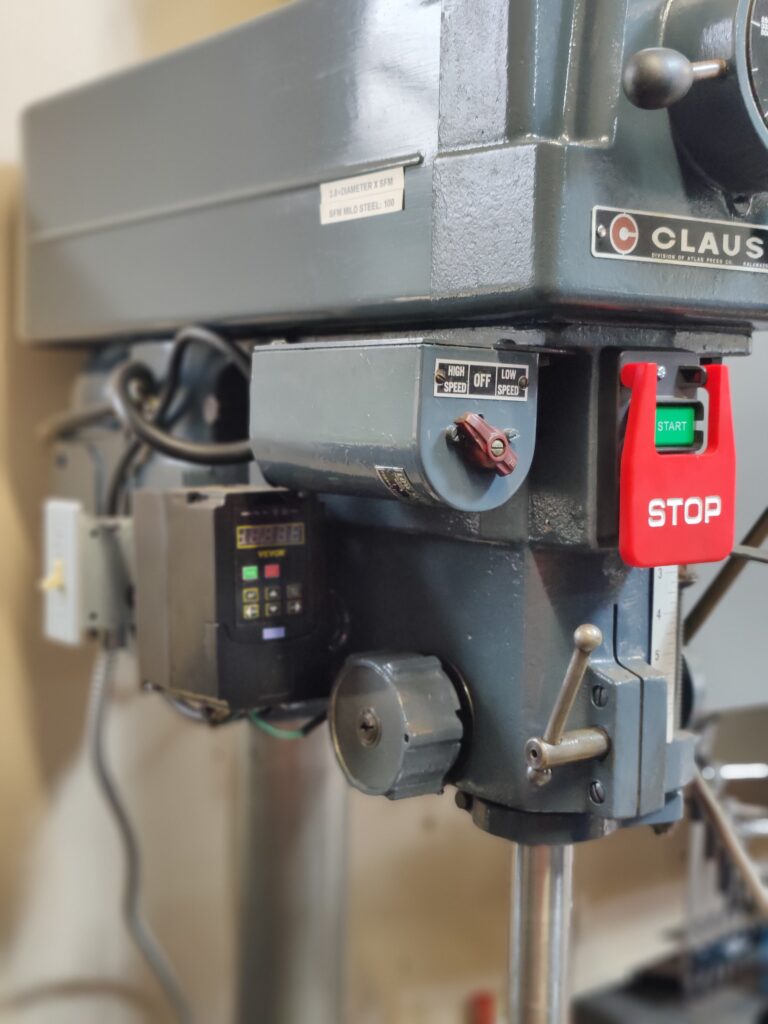
Output from the VFD still runs through a High Speed / Low Speed drum switch, which I left untouched. The switch engages different windings on the motor. Although it would be a BAD IDEA to change the windings while the VFD is powered up, with the power cut it can be switched just fine. Between adjusting the frequency of the VFD, switching the windings, and the variability of the Reeves Drive, speed on the press is now infinitely adjustable. Interestingly, I find myself reaching for the Reeves drive wheel to adjust spindle speed, rather than mashing buttons on the VFD.
With the table and column cleaned up, the castings painted, and the machine wired for action, she’s almost as good as new. Almost.
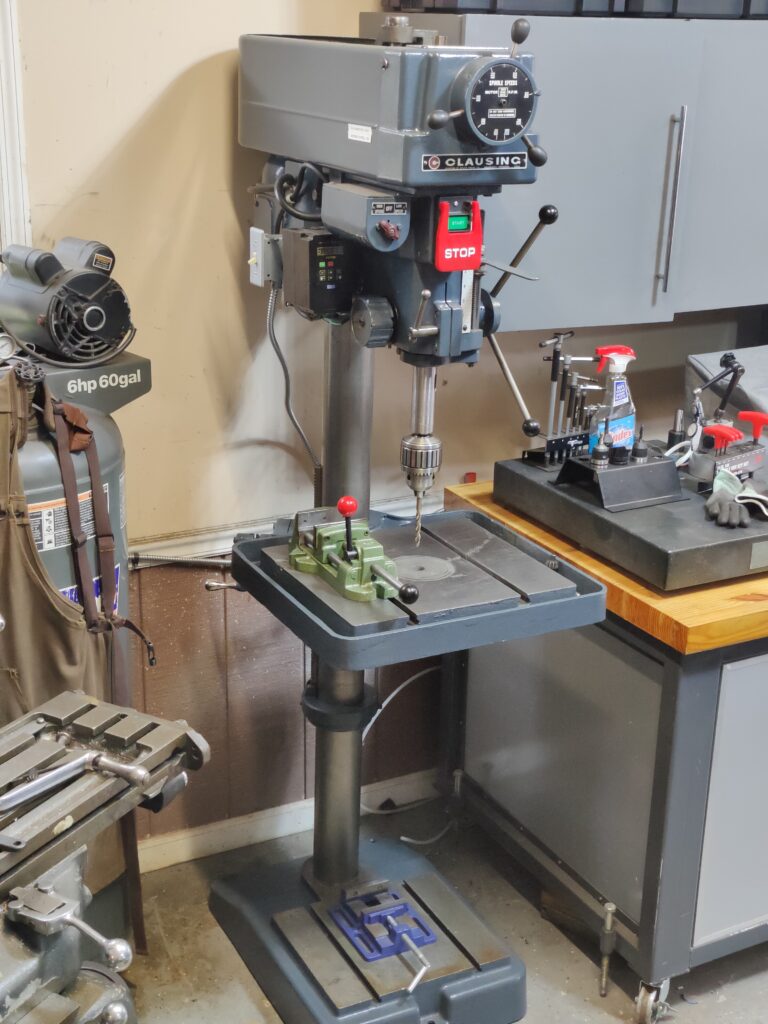
As a final touch to put the press back into service, I was able to locate a Jacobs 18N ball bearing chuck which runs truer than it has any right to. With the new spindle bearings and a precision pin chucked up, I’m getting around .001″ of runout about a half inch below the chuck nose. Runout at the spindle nose is less than half that – more precision than someone like me will ever need out of a drill press.
Well, that’s about it. For my next project I am working on cleaning up a Queen City 12″ grinder, and will have an update on that undertaking soon!